
The canned effect files I've included are great, but the whole point of adding support was so you could make and edit your own to get the most out of the rather limited force-feedback most mame games provide. In this tutorial I'm going to walk you through creating a simple effect file for a wheel with a square effect and a center spring. The first thing you want to do is plug in the device you wish to use (for our purposes a FF-enabled wheel) and then launch fedit.exe from your mamehooker/tools folder.
Now go to File/Select Device, and select your wheel.
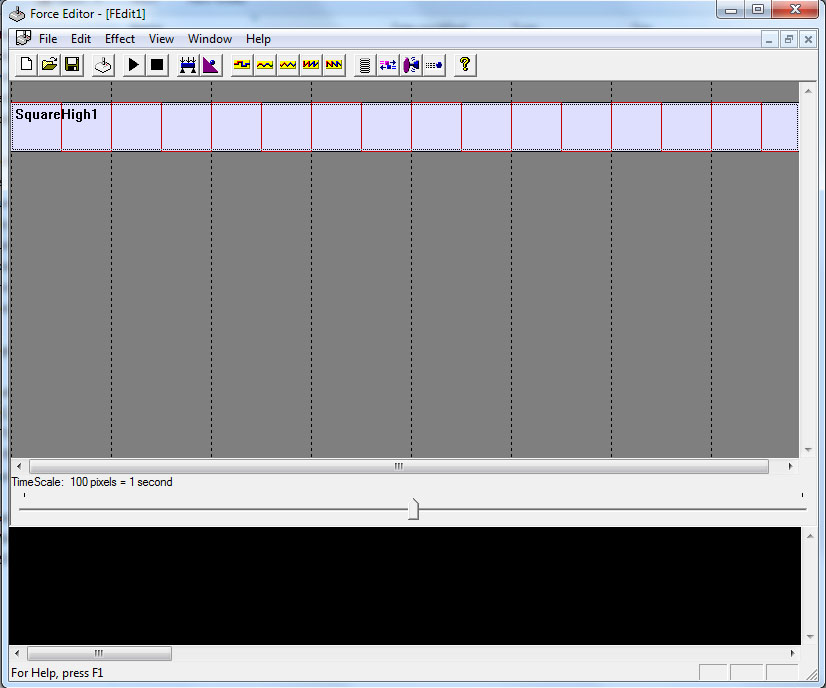
Ok now let's add a square wave effect for some rumble action. Go to Effect/Insert/Square Wave. For whatever reason when fedit adds an effect it puts it a bit to the right, essentially creating a delay. We don't want that, so drag the effect all the way to the left.
When you are done it should look something like this:
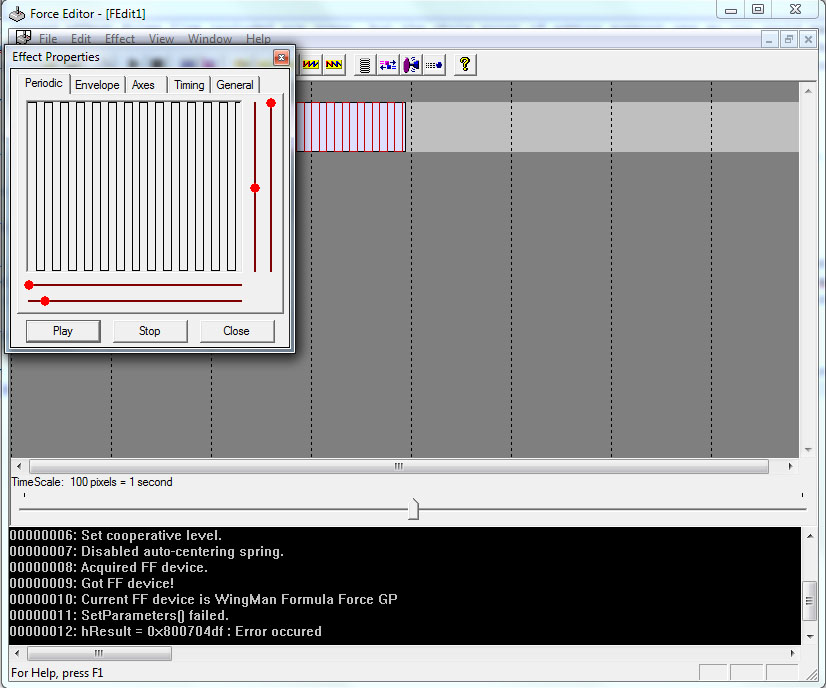
You can play it if you want, but either it won't work, or won't be what you are expecting at all. We need to alter the effect somewhat. So go ahead and right-click the effect to access it's properties. The first thing you want to do is set the axes in the Axes tab. This is CRUCIAL for proper mamehooker operation. If an Axes is improperly defined it will NOT work in mamehooker. If you are using a generic FF wheel, the wheel itself is the only axis with force-feedback, so set the first axis to the wheel axis, and the second to none, as shown:

Now things are mamehooker compatible. But we aren't done. If you've played the effect already, you'll notice that it just slowly moves the wheel back and forth, that isn't what we want at all, it needs to be quicker, so let's adjust this in the Periodic tab. In this tab you can adjust things like the up and down strength and the timing of the up and down strokes. For our purposes though we want to shorten the overall speed of the square wave. So take the slider at the very bottom and move it left until it feels appropriate. When you are done it'll look something like this:
Lastly, something you'll notice is that after a while, the playing effect stops. For mamehooker, we typically want an effect like this to play indefinitely, mamehooker will control the duration, so let's go to the timing tab and check the "infinate" box. Now the effect will continue to play until you press stop.
Ok now this is all well and good, but the wheel is probably moving sloppily. So let's just add a spring effect. Go to Effect/Insert/Spring. Now I won't hold your hand this time, you'll need to set the axes and duration just like you did before, and drag it to the left. Play the effect and you'll get a rather strong spring. You can alter the properties of the spring in the Spring Axis 0 tab. Note that occasionally fedit will lose the wheel when you alter the spring effect, so you might want to stop the effect while altering those settings.
You are done. Save this file as "customwheel." or discard it and use the one I've included. Now this particular file we've crafted is designed to be tweaked with tweak files, which will be the focus of the next tutorial. Until then.
IMPORTANT NOTE: In the next tutorial when you are tweaking files, I'll often mention the effect layer/number. This refers to the effects you see in the file in the fedit.exe. The effect at the top is #1 the next is #2, ect.
 Calendar